We will make an example of a game with 2 levels with Scratch. In the first level of our game of matching the color-changing ball and the rectangle, which we will do with the Scratch program, there will be a rectangle that we can move left and right with the arrow keys. The color name will be written inside the rectangle. Colorful balls will come from the upper part of the stage. If the color name in the rectangle and the colored ball are the same, hit the ball and your number of Greetings will increase by one. If not, your remaining health will decrease by one. When your greeting number is 5, you will pass to level 2. In order to make the game a little more difficult at level 2, the color name in the rectangle and the color of the rectangle will be different. But the user will decide whether or not to touch the ball based on the color name. The rectangle color here is made so to force the user. Let's come to the code descriptions of the game;
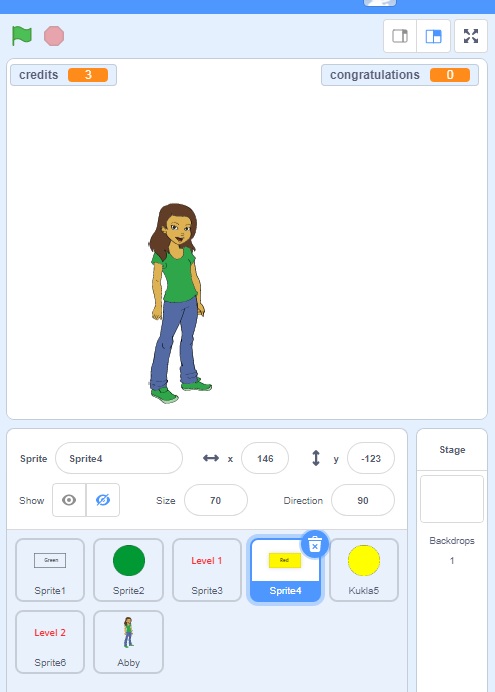
By adding a new sprite, we are adding the human character
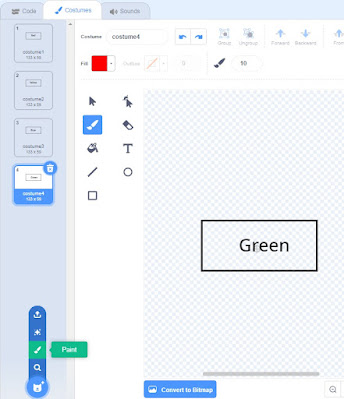
who will direct at the beginning of the game. Next, we draw a hollow rectangle
of disguises by selecting the paint mark.
We extract the rectangle into 4 rectangles by right-clicking
(in disguise) and saying "copy". Using the text tool (the tool with
the text T) we write the color names in the rectangles in order.
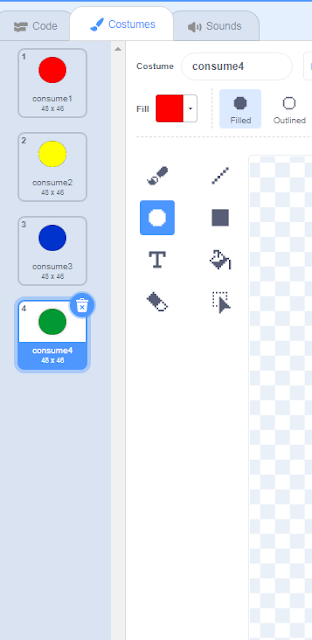
We draw 4 ellipses using the circle sign. We make the color
of each circle different.
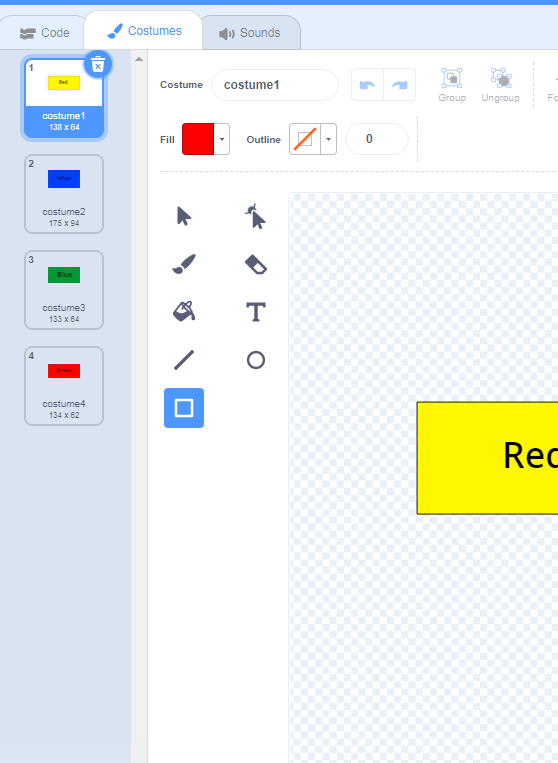
For the 2nd level of our game, let's draw a rectangle and
multiply it again. However, rectangle names and rectangle colors will be
different.
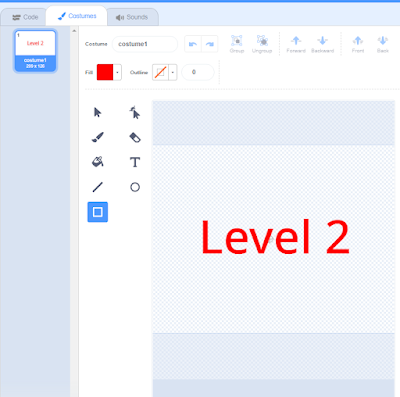
Let's write Level 1 and Level 2 texts with the text tool
using the pen pointer and move on to coding our game.
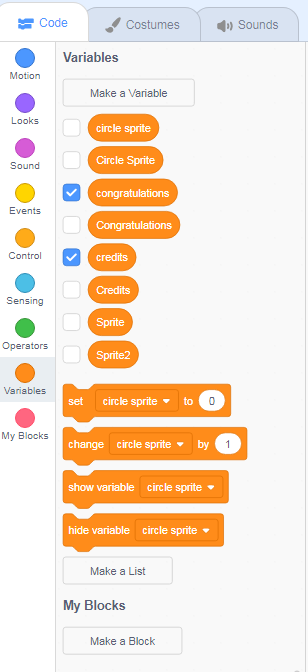
We create the 8 variables above. It will appear on the
screen with a check mark to the left. Others will keep data in the background. Credits
variables will initially be 3. We will encode the Congratulations Number
variable to be 0. If you notice, credits and Credits, and congratulations and congratulations
are different variables.
Our codes usually start with a green flag code. Then our sprite
will appear because after giving information about the game, we will hide it on
the stage by hiding it. We use the Looks menu for speech bubbles, show and hide
commands. After the instructions about the game are finished, an event must be
released in order for the Level 1 text to appear on the stage. We are releasing
a news called "Start the game" by using the release news command from
the events menu.
Codes written inside the Level 1 Sprite;
When the green flag is clicked, the level 1 text will be
hidden. Because first, the human character will come out and give instructions
about the game. When the instructions were over, the game start news was
released. When this news comes (we add it from the events menu), we make the
Level 1 sprite text appear with the "show" command from the Looks
menu. After it appears, we wait 1 second and increase the size of the text to
125%. Then we wait for 1 second and resize it to 100%. This process is done 2
times, so we add the effect of enlarging and reducing the text, and we wait for
1 second and hide this sprite with the hide text command.
The codes to be written inside the colored ball (Sprite 2);
Hide the sprite when the green flag is clicked. Because at
the beginning of the game, the human character comes out and gives instructions
about the game. We use the go up command so that when the ball comes over the
rectangle, it will appear in front of it, not standing behind it. We wait for
24 seconds for the ball to appear, because first the human character tells the
user the instruction about the game, then the level 1 text appears, while the
elapsed time is close to 24 seconds, so we hide the ball. If we want our ball
to appear in a random coordinate, we move our circle to the right first and
create a variable named Circle Sprite from the Variable menu. The ball has 4 different consume. In
other words, instead of using 4 different colored balls, we create 4 different
consumes inside 1 circle. We do this switching between disguises using the
random command. We create a number between 1 and 4 and assign this number to
the variable sprite of the Circle. Whatever the value of the number in this
variable is, it changes to that numbered consume, and then our colored ball
appears. Since the downward movement of our ball is on the y-axis, if we
increase the y value in the negative direction and move it, it will move
downwards. In order for this movement to be continuous, we add our movement
code into theforever code from the Control menu. Of course, when our ball moves
down and touches the edge, we get the code again from the control menu, if any,
to disappear when it touches the edge and is it worth the edge from the sensing
menu? we get the code. In other words, if the ball is worth it, we have created
our condition. If the ball touches the edge, the ball will be hidden. After 1
second, we create a random between 1 and 4 for the consume of the circle in
random x and y coordinates and make the circle appear in that guise.
Did the 2nd possibility for the ball touch the rectangle? ;
Let the ball be hidden when it touches the rectangle, if the
comsume of the circle and the consume of the rectangle are the same (the colors
in the rectangle have the same names and the order of the circle in different
colors is the same), that is, if the color of the circle and the name of the
color written in the rectangle are the same, the Number of Congratulations
variable will increase by 1 and news will be broadcast. If not, let the credits
decrease by 1 and spread the news. Then wait for 1 second and the circle will
appear in a random coordinate and disguise.
When this ball (sprite) passes in the 2nd level in the game,
when the news comes, it will be hidden and the codes in this sprite series will
stop working. Our aim here is to prevent this ball from appearing and moving
downwards, we will use a different ball (dummy) for the 2nd level.
Codes written inside the rectangle (colorless text dummy,
sprite 1);
When the green flag is clicked, we wait for 3 seconds
continuously, generate a random number between 1 and 4 and assign this number
to the consume variable. The variable in this number is our rectangular shape.
In other words, the color name in that numbered consume appears in the
rectangle.
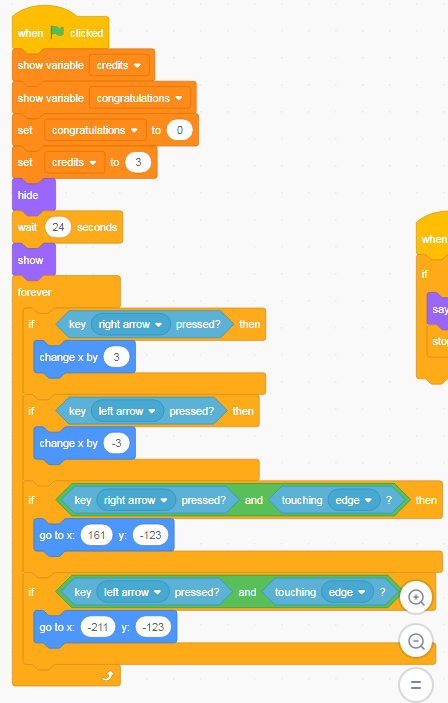
When the green flag is clicked, the credits variable is 3,
and the Number of Congratulations variable is 0. First, hide this sprite
because at first the human character will come out and give instructions about
the game, then the level 1 text will appear, while an average of 24 seconds
will pass, wait for 24 seconds, then the visible code has been added. So that
the rectangle sprite won't show up before the instructions are finished. To
move the rectangle left and right continuously, we first add the forever code.
Then we check the inside of the code to see if our condition is met, if it is,
we do this with the code whether the right arrow key is pressed inside the
code. If our condition is met, we move the rectangle to the right by moving it
in the x (positive) direction. We use the same code to move left. To move it to
the left, do we add the left arrow key to the code and if we move it in the x
(negative) direction, we will move it to the left.
In order for this rectangle not to go off the screen, two
conditions must be met at the same time. In order for it not to go out of the
right screen, we add the AND code, which ensures that two conditions are met at
the same time, into the code if the right arrow key is pressed and does it
touch the edge? Adding the codes. If these two conditions are met at the same
time, the rectangle goes to the coordinates we have given, and the coordinates
of the rectangle when it touches the edge remain constant. We do this so that
it does not go out of the left screen.
If the color ball (Sprite 2) was not the same as the ball's consume
number and the rectangle's consume number, we reduced the credits health by 1.
That is, if the color of the ball and the color name written in the rectangle
were not the same. It sends a notification when the credits is reduced by 1.
When this news comes, the number of credits is checked. If the credits is 0,
sorry lost, and the whole game will stop, otherwise the game will continue
until it reaches 0.
If the color number of the colored ball (Sprite 2) is the
same as the number of the ball and the number of the rectangle, we have
increased the Number of Congratulations by 1. In other words, if it is the
color of the ball and the name of the color written inside the rectangle.
Congrats Sends a message when the number is increased by 1. Checking the Number
of Congratulations when this news comes. If the Number of Congratulations is 5,
congratulations you have passed to the next level will be written and the level
2 news will be released. Thus, level 2 will begin.
Level 2's logic will be the same. Just to force the player,
the color we write inside the rectangle will be different from the color of the
rectangle. The user should pay attention to the text inside, not the color. You
can add to the game. For example, you can put in time and make the game a
little more difficult.
To download the source code of the program CLICK HERE
To see the running version of the program CLICK HERE
For All Scratch Examples CLICK HERE
For Mblock With Arduino Examples CLICK HERE





Comments
Post a Comment