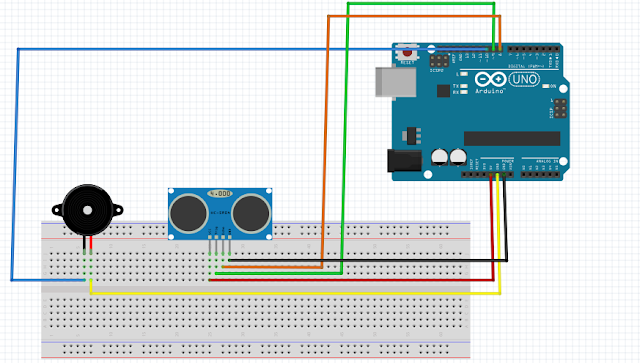
NTC is a temperature sensitive sensor. In this application, we will make a temperature measurement with the NTC Sensor and make a fire alarm application using the Buzzer.
A list of materials:
2-BreadBoard
3-1 Buzzers
4-1 NTC Sensor
5-Jumper Cables
6-1 LEDs
We connect the long leg of the Buzzer, which we added to our
breadboard, with the jumper cable to the digital pin 11 in our ardunio uno
material. We connect the short leg of the buzzer to the GND (negative) terminal
of the Ardunio Uno with a jumper cable. NTC Sensor has 2 legs. Their legs are
of equal length. We connect a resistor to one of the legs. We connect the end
of the resistor to 5 Volts. We connect it to one of the analog pins with a
cable from the leg to which we connect the resistor. I connected it as A0. We
connect the other leg of the NTC to the GND (negative) terminal. We connect a
resistor to the long leg of the LED. From this end, I connected it to the
digital pin 8 with a cable. We connect the short leg to the GND terminal. The
circuit diagram is given below.
Code Part:
In the Mblock program, we add the Arduino program starter code from the Robots menu. After adding the forever code from the control menu, we add the code to say hello to the serial port to show us the temperature inside. In the inner part of this code, we will assign the temperature value measured by the ntc sensor. For this, we connected NTC to analog pin A0. By reading the value on this pin and showing it to us (For this, we need to choose the letter state while in Arduino mode) After waiting for 0.1 seconds, we will run the led and buzzer according to the value measured by the NTC. First of all, we add the code to the screen, if not, from the control menu. We've added the smaller code from the Operations menu to make comparisons inside the if. If the value measured by NTC is less than 650, the LED will turn on and the buzzer will work. Otherwise, the Led and Buzzer will not work. These processes will continue continuously. To increase or decrease the NTC value, light a lighter and bring it closer to the NTC and you will see that the measured values change. Let's be careful while doing this.
After selecting Arduino Uno (or
choose which board you are using) from the Boards menu, select the Arduino mode
from the Edit menu and by pressing the Upload to Arduino button, we will send
the codes we have written to our Arduino board and upload them. Thus, our
program becomes ready to run.
To download the source code of the program CLICK HERE
Similar Topics


Comments
Post a Comment